
In continuation to the “Basics of Digital Photography Series” understanding of the Exposure Triangle remember that the three elements of photography are ISO, Aperture and Shutter Speed. We covered ISO in the last article and today we shall talk about Aperture. This is an area where one should concentrate and try to master the same as playing around with the aperture settings can give dramatic effects to photographs.
What is Aperture?
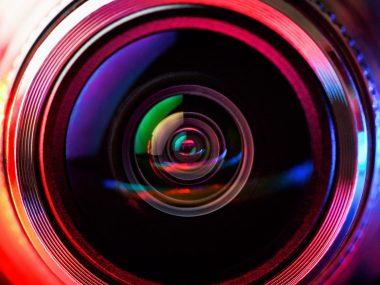
To explain this in simple terms, aperture functions the same way as the pupil of an human eye. The function of the pupil in human eye is to expand and contract and thus control the amount of light that falls on the retina. Similarly, the aperture in a camera controls the amount of light that falls on its sensors or film to make a picture. In short, the aperture of a lens is the diameter of the lens opening and is usually controlled by an iris. The larger the diameter of the aperture, the more light reaches the film or sensor. Aperture is expressed or measured in f-stop. For example, f/2.8 or f/2.8. The smaller the f-stop number, the larger the lens opening (aperture). These values represent one time the amount of light either more or less in quantity. So, f/16 will let in 1X the amount of light when compared to an opening of f/22; while on the other hand, an aperture of f/4.0 will let in 1X lesser than that of f/2.8.

My personal preference for a ‘good’ aperture range is f/1.8 to f/16. There are 5 f-stops between the minimum and maximum aperture. So, if your camera’s lens is currently set at an aperture of f/5.6, closing it by 1 f-stop would mean selecting F8 and opening it up by 1 f-stop would mean selecting f/4. This makes us think, which aperture setting is the best. Well, this comes more from practice as well as the kind of effect that you want your final photograph to carry. Ideally, one needs to find out the sweet spot of the lens to find out the best aperture. It is evident now that the larger the aperture, the better your DSLR will perform in low-light situations, since a larger lens opening is able to allow more light than a smaller lens opening.
Depth of Field (DoF)
When the shutter button is released, light passes through the aperture diaphragm and hit the film, an exposure is formed. Basically, aperture along with duration/timing of the shutter opening – both contribute to exposure. But aperture also affects an important photographic element called “Depth of Field”.
Depth of Field is a technical term used to describe the “area of sharpness” between the near and far values of a subject in focus.

Thus, Depth of Field refers to the range of distance that appears acceptably sharp. It varies depending on camera type, aperture and focusing distance and it does not change abruptly from sharp to blur. In fact, it is a gradual transition. Imagine shooting a photograph in a crowded street with your loved ones. If the correct aperture is not used to cause a small Depth of Field, your loved ones will merge in the crowd causing distraction in the final result. The best setting here would be to use a small depth of field to blur out the crowd so that your loved ones remain in focus. Let’s look at a couple of photographs which show how aperture settings affect the depth of field of a picture. In the photograph below, while the flowers are in focus, the small Depth of Field causes the background to blur. This keeps the focus of the viewer on the subject (flowers) without causing distraction from the background.

The aperture setting used here is at a fractional value of f/6.3.In the photograph below, everything from the stalks in the foreground to the mountains and sky in the background is in focus. Using a high aperture setting here ensures that everything within the depth of field is in focus.

In this case, the aperture was set to f/16.
In short, just remember this – the key to a theoretical good EXPOSURE = APERTURE + SHUTTER SPEED.
With this, we conclude series on the Basics of Digital Photography – Exposure Triangle where we discussed the three main elements – ISO, Shutter Speed and Aperture. I hope you enjoyed the series as much as I did writing it.


2 comments