
With this article I start the series of “Basics of Digital Photography” and to begin with we shall understand the Exposure Triangle.
But, first things first – I’m not a pro or a guru of photography and my learning curve still rises with every single photo that I take. It all started with a summer vacation course in photography when I was about 10 years old. It was really an awesome experience as I found a new dimension to explore my creativity. My grandfather’s Zenith SLR camera (fully manual Russian camera), which was locked up by my father and well preserved, could not have proved more helpful then ever during my 6 weeks of training.
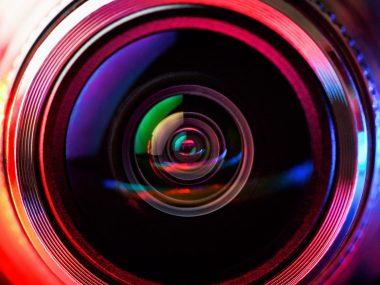
It was the first day at the institute and of course the first chapter was to understand the parts of an SLR camera. Interesting! But my mind started to bog when complicated words like Aperture, ISO and Shutter speed were being thrown at me. “Want your shutter to be open for one-thousandth of a second? Then your camera’s shutter speed should be set to 1000. Want it to be 2 seconds? Look for 2″ sign on the dial. What’s bigger? An aperture setting of f1.4 or f16?” – Go ahead – scratch your head. Even I did the same.
All this might make sense to professional photographers who have become professional after years of experience. For a newbie it is rocket science. But trust me, it’s not that hard. One might not get it the first time, but once you start taking snaps, analyze them and play with these settings, the results will speak. Let’s start by understanding the basics of the three main elements of exposure in photography:
- Aperture
The aperture controls the size of the lens opening. It is like the iris in your eye. If an environment is too bright, the iris contracts to restrict the amount of light entering our eyes and if it gets dark, it expands and more light enters. Similarly, the aperture is the iris of a camera. The aperture settings also determine the Depth-Of-Field (DoF) – a very important aspect if you want to shoot some great photographs.- Remember:
– A smaller number means there is a larger lens opening, thus allowing more light into the camera
– A larger number means a smaller lens opening, thus allowing less light into the camera
- Remember:
- Shutter
The shutter controls the amount of time the camera has to let light in and time to capture movement. This is the eyelid of the camera system.- Remember:
– A smaller number means shorter exposure time, thus “freezing” any action. It also means less light will get in
– A larger number means longer exposure time, thus “blurring” any action. It also means that more light into the camera will get in
- Remember:
- ISO
ISO controls the sensitivity of sensor to light and the amount of grains on the picture. It is like a magnifying glass on a photo. The closer you get, the grainer the image (thus the higher the ISO, the grainer the picture).- Remember:
– A smaller number means the sensor will be less sensitive to light (allowing in less light) and have a finer grain on the final picture
– A larger number means the sensor will be more sensitive to light (allowing in more light) and have rough grain on the final picture
- Remember:
To summarize, the ISO controls the amount of light that falls on the sensor and controls the light required to obtain an image. By changing the Aperture, you change depth of field. By changing the shutter speed, you decide how the motion is captured. These three elements of exposure are inter-connected and changing the value of one has a direct effect on the other two. The exposure triangle diagram here would help to understand that better:

A well exposed photograph is a result of the correct Shutter speed, the correct ISO and the correct Aperture. The exposure triangle defines the relationship between all three of these photographic aspects. No single setting is just right or called an ideal exposure. The best way to learn this is to go out and shoot some photographs while taking notes of the exposure settings. Note down the time of the day or night (gives you idea about ambient light), the Aperture value, the Shutter Speed, the ISO setting and the Camera Mode (Auto, Manual, Aperture Priority, Shutter Priority, etc.). Come back home, download the photos on your computer and analyze them. The exposure settings noted down while you shot the photograph will certainly help here.
In the next series we shall discuss these three elements in more detail, preferably with some examples. Yes, your read it right – with examples because a picture is worth a thousand words.


9 comments
Hi vishalsir,
I must say very good article, hats off.
I was not at all a camera person, but ilesh got cannon G9 which is not SLR but very good for learner. So he bought this because it was on very deal, and neither he nor I know photography, and it was like a nightmare when we go out and try to take picture. The pictures are so bad, sometime I thought to throw this. But then I decided to learn this and now I’m very keen to learn this and I am learning this at the moment and come across with this article and realise that it’s you. So it will be good to learn under you…
Excellent article – thank you. You explain well
Thank you.
Hello Vishalbhai,
at right time i read your article, i just bought DSLR Nikon 5000. exposure triangle is good thing to know for novice user. I planned to join the class to learn how to operate and basics of photography.but if you keep continue with your blog, i don’t think i need to go for it any more.
look forward to see more posts from you,
Thanks,
Nachiket.
Hi Nachiket,
Congratulations on the purchase of Nikon 5000. Good camera. Glad that you liked the post. I’m going to explain the ISO, Aperture and Shutter with some examples pretty soon.
Dear Vishal
Good guidance to us novice in photography .
Pl continue to post
Samir
Thanks Samirbhai.